
Article directory
CentOS Web Panel, or CWP, is a powerful, free web hosting control panel that provides an easy-to-use interface for managing servers and a wide range of administrative tasks.

It is designed for CentOS, RHEL, and Cloud Linux.
This article will walk you through enabling CSF Firewall on CentOS Web Panel (CWP).
What is CSF Firewall?
Config Server Firewall (or CSF) is a free premium firewall that works with most Linux distributions and Linux-based VPSs.
CSF (ConfigServer Security and Firewall) is the default firewall that comes with the CentOS web panel.As of this writing, CSF is installed, but not yet enabled.
How to enable CSF Firewall in CentOS Web Panel (CWP7)?
Step 1: Log in to the CWP Admin page as root ▼
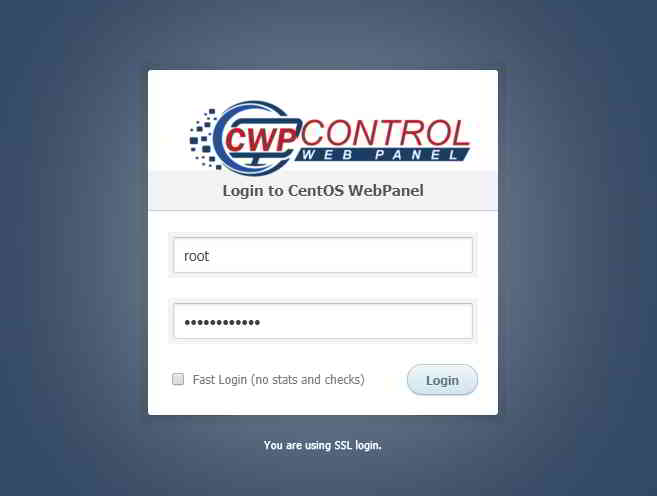
After finishing the installation of CWP on CentOS 7, let's go to the URL https://your_server_ip:2031 and provide credentials that will be available at the end of the installation.
For instructions on installing the CWP control panel , please see the following link ▼

note:
- URL starts with
https://start instead ofhttp://beginning. - This means that we are accessing CWP over a secure connection.
- Since we haven't set up any security certificates, the unsigned server's default generated certificate will be used.
- That's why you will get a warning message from your browser.
When logging into the CWP control panel, you will see a warning ▼
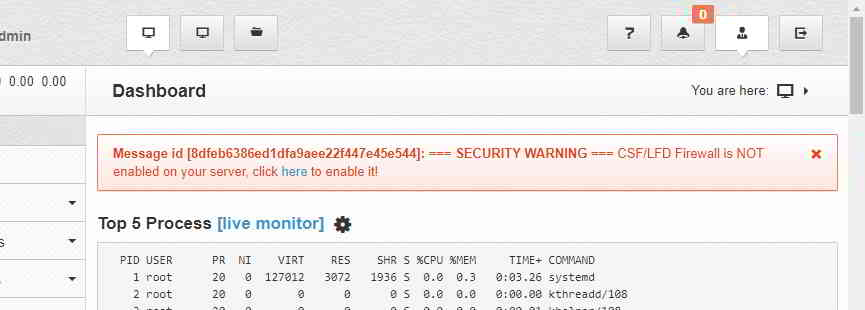
Message id [8dfeb6386ed1dfa9aee22f447e45e544]: === SECURITY WARNING === CSF/LFD Firewall is NOT enabled on your server, click here to enable it!
Step 2: Click on Security → Firewall Manager in the left navigation bar ▼
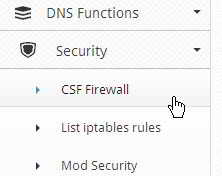
You will see a log similar to the following run▼
Running /usr/local/csf/bin/csfpost.shStarting lfd:[ OK ] csf and lfd have been enabled
Step 3: Click the Enable Firewall button ▼
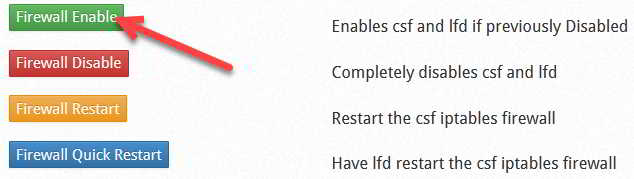
Running /usr/local/csf/bin/csfpost.shStarting lfd:[ OK ] csf and lfd have been enabled
Step 4: CSF and LFD (Login Fai lure Daemon) are now enabled .
You can now turn off warning messages from the CWP dashboard
You can also enable CSF via the command line, usingcsf -eOrder:
[root@cwp1 ~]# csf -eBy default, the open ports are: TCP IN: 20, 21, 22, 25, 53, 80, 110, 143, 443, 465, 587, 993, 995, 2030, 2031, 2082, 2083, 2086, 2087, 2095, 2096 OUT: 20, 21, 22, 25, 53, 80, 110, 113, 443, 2030, 2031, 2082, 2083, 2086, 2087, 2095, 2096, 587, 993, 995 UDP IN: 20, 21, 53 OUT: 20, 21, 53, 113, 123
CentOS Web Panel (CWP7) Enable CSF FirewallVideo tutorial
The method of enabling CSF firewall in CWP7 is very simple.
Below is a YouTube video tutorial on enabling the CSF firewall in CWP7 ▼
Hopefully, the article "Enabling CSF Firewall in CWP7 to Resolve CSF/LFD are not disabled" shared on Chen Weiliang's blog ( https://www.chenweiliang.com/ ) will be helpful to you.
Feel free to share this article's link: https://www.chenweiliang.com/cwl-1413.html