
Article directory
How do I install the CWP control panel?
CENTOS Web Panel Configuration Tutorial
For online marketers using VPS to build websites , there are numerous free and paid control panels to choose from. When unsure which VPS control panel to select with full functionality, CWP control panel is recommended.
What is CentOS Web Panel?
CWP Control Panel is designed for RPM-based distributions such as CentOS, RHEL, Scientific Linux , etc.

It is a free and open source control panel that can be widely used to easily configure web hosting environments.
Unlike other control panels, CWP automatically deploys LAMP software and a Varnish caching server.
Install CWP system requirements
- 32-bit server 512MB RAM
- 64-bit server 1024MB RAM
- Hard disk 10 GB
operating system
- CentOS 6.x, 7.x
- RedHat 6.x, 7.x
- CloudLinux 6.x, 7.x
To avoid any problems, be sure to read the entirety of this instructional tutorial carefully before the installation process.
- The CWP control panel only supports static IP addresses.
- The CWP control panel does not support dynamic or internal IP addresses.
- CWP Control Panel does not offer uninstallers.
- After installing CWP, you must reinstall the server to remove it.
- Installs CWP only on newly installed operating systems without any configuration changes.
CWP Control Panel Features
CWP has many features and free services.
As Chen Weiliang mentioned earlier, CWP will automatically install a complete LAMP service (Linux, Apache, PHP, MySQL , phpMyAdmin , webmail , mail server, etc.) on your server .
The following are the features and services available on CentOS Web Panel:
- Currently includes admin and client panels
- (You can also request to build custom modules for integration)
Preparation for installing CentOS Web Panel (CWP)
If your VPS background, before installing the CentOS system, did not set the host name and IP address, you may need to manually set the host name and IP address.
set hostname
To start the CWP installation, log in to the Linux server as the root user. According to the instructions on the CWP official website, make sure to set the hostname first.
Important: The hostname and domain name on the server must be different (for example, if domain.com is the domain name on your server, then use hostname.domain.com as your hostname).
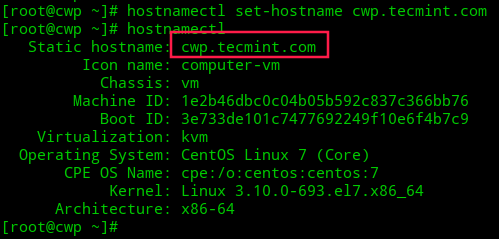
hostnamectl set-hostname hostname.domain.com
hostnamectl
- Please change hostname.domain.com to your secondary domain name.
Set the server IP address
If the VPS server you are using has already set the server IP address, you can skip this step directly.
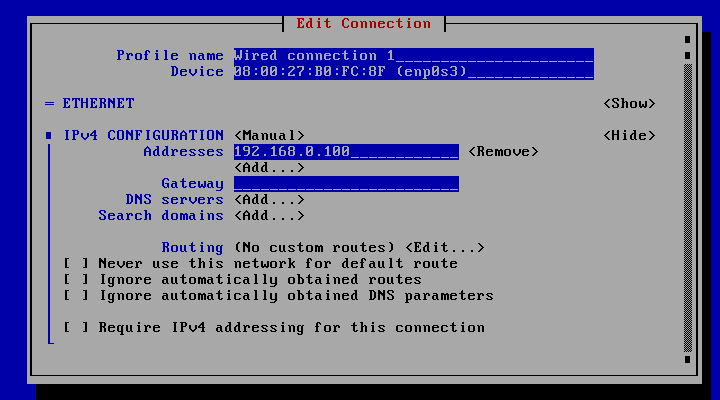
Otherwise, you may need to set the server IP address. We will use the nmtui ( NetworkManager text user interface ) utility, which provides a graphical user interface to configure the IP address by controlling the network manager.
yum install NetworkManager-tui
nmtui
Server update
Step 1: Install and download the wget package required for CWP ▼
yum install wget -y
- If an error message appears after entering the above command, please reinstall the server and use the following command instead▼
yum install wget
Step 2: Use this command to update your server ▼
yum update -y
Step 3: Restart once to activate the update ▼
reboot
Install the CWP program
There are 2 versions, please choose according to your CentOS version:
- Install the CentOS 6 version of CWP6
- Install the CentOS 7 version of CWP7 (recommended)
Install the CentOS 6 version of CWP6
Step 1: Navigate to the / usr / local / src directory ▼
cd /usr/local/src
Step 2: Use this command to download the latest CWP version ▼
wget http://centos-webpanel.com/cwp-latest
Step 3: If the above URL is incorrect, please use the following link instead ▼
wget http://dl1.centos-webpanel.com/files/cwp-latest
Step 4: Use this command to begin installing CWP ▼
sh cwp-latest
Install the CentOS 7 version of CWP7 (recommended)
cd /usr/local/src
wget http://centos-webpanel.com/cwp-el7-latest
sh cwp-el7-latest
- If the above URL is wrong, please use the link below instead ▼
http://dl1.centos-webpanel.com/files/cwp-el7-latest
CWP installation process example ▼
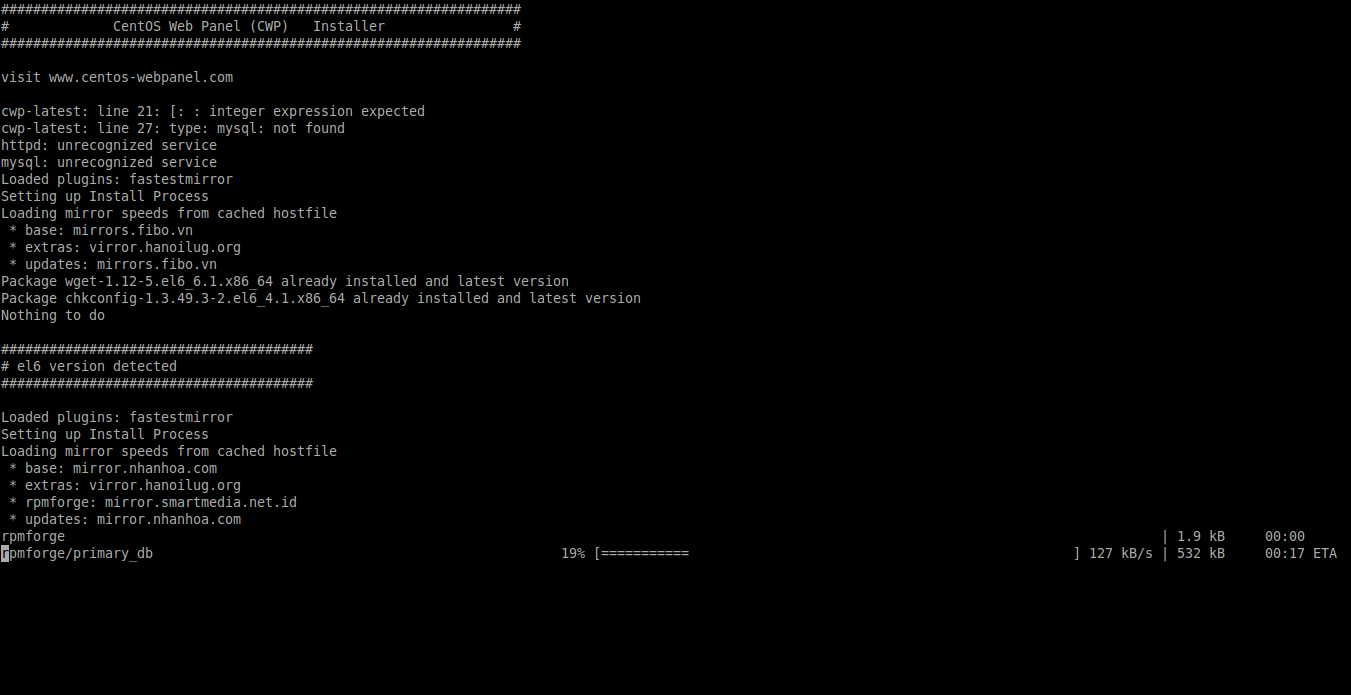
Chen Weiliang's installation process only took 5-10 minutes. For internet speeds below 4G, it could take 10 minutes, 30 minutes, or even longer, depending on your network speed.
Finally, you will see the following installation complete message ▼
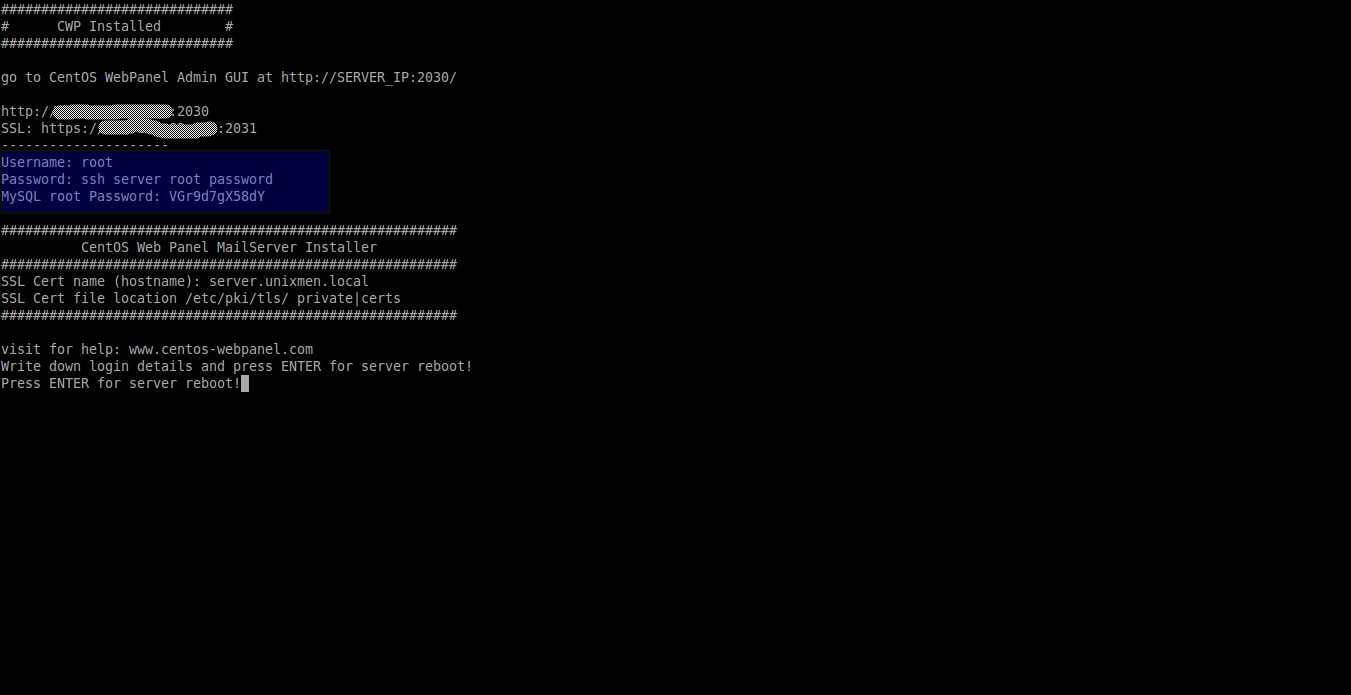
Step 5: Please record this important information, for example:
- MySQL superuser password, CWP login URL because you will need it later.
Step 6: Then press Enter to restart the system. ▲
Firewall/Route Configuration
The default web control interface ports for CWP are 2030 (HTTP) and 2031 (HTTPS).
You should allow these two ports to access the CWP web console remotely through the firewall/routing.
Step 1: Edit the iptables file ▼
vi /etc/sysconfig/iptables
Step 2: Add the following content ▼
[...]
-A INPUT -p tcp -m state --state NEW -m tcp --dport 2030 -j ACCEPT
-A INPUT -p tcp -m state --state NEW -m tcp --dport 2031 -j ACCEPT
[...]
Step 3: First press the ESC key to exit editing, then type ▼
:wq
Step 4: Update the iptables service to make the changes take effect.
service iptables restart
Login to CWP Control Panel
Open your browser and type:
http://IP-Address:2030/
or:
https://IP-Address:2031/
You will see a screen similar to the one below ▼
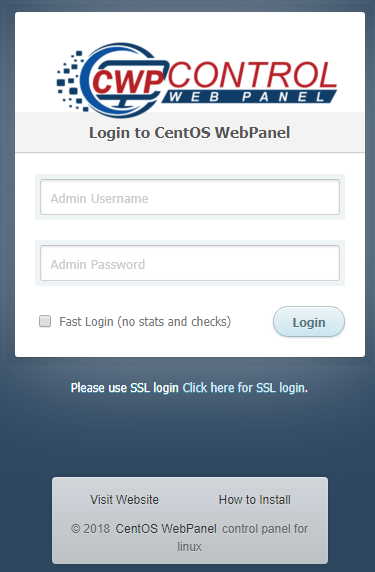
login authentication
- 用户 名:root
- 密码:your root password
Congratulations! CWP has been successfully installed.
CWP Control Panel Configuration
Next, we must give the CWP control panel some basic configuration, such as:
- Set up IP sharing (must be your public IP address)
- Set up a domain name server
- Set at least one managed package (or edit the default package)
- Set up root mail etc.
Create a shared IP and root email address
- This is a very important step in hosting your website on your host.
In order to create a shared IP, go to CWP Setting → Edit settings ▼
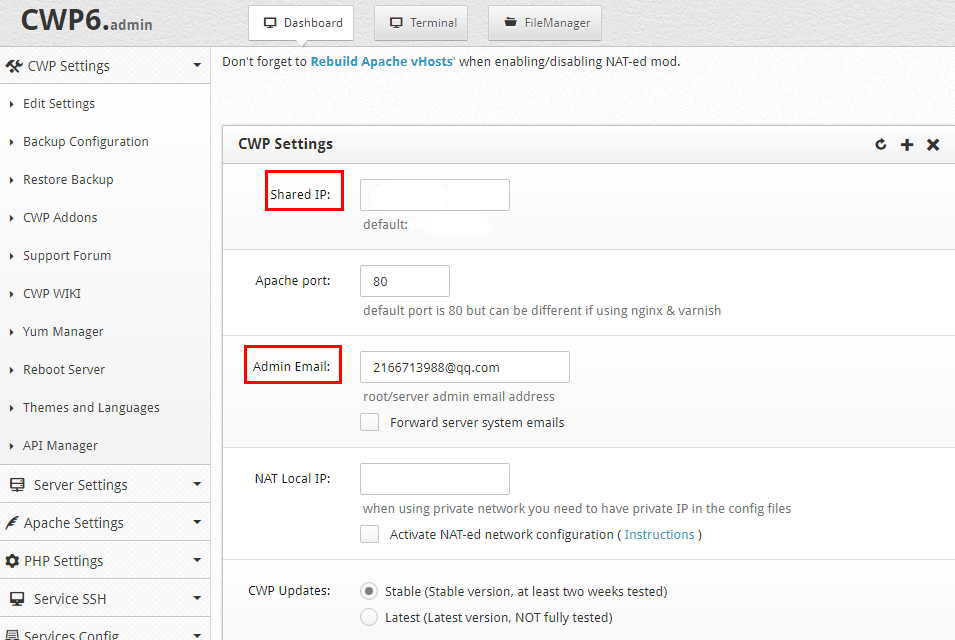
- Enter your static IP and email address
After setting, click Save Changes to save the changes▲
- After setting up a shared IP address, now you can start maintaining your website with CWP ^_^
Create a domain name server
- If you use another name server, such as: DNSPOD, please skip this operation.
To create a nameserver, go to DNS Functions → Edit nameservers IPs ▼
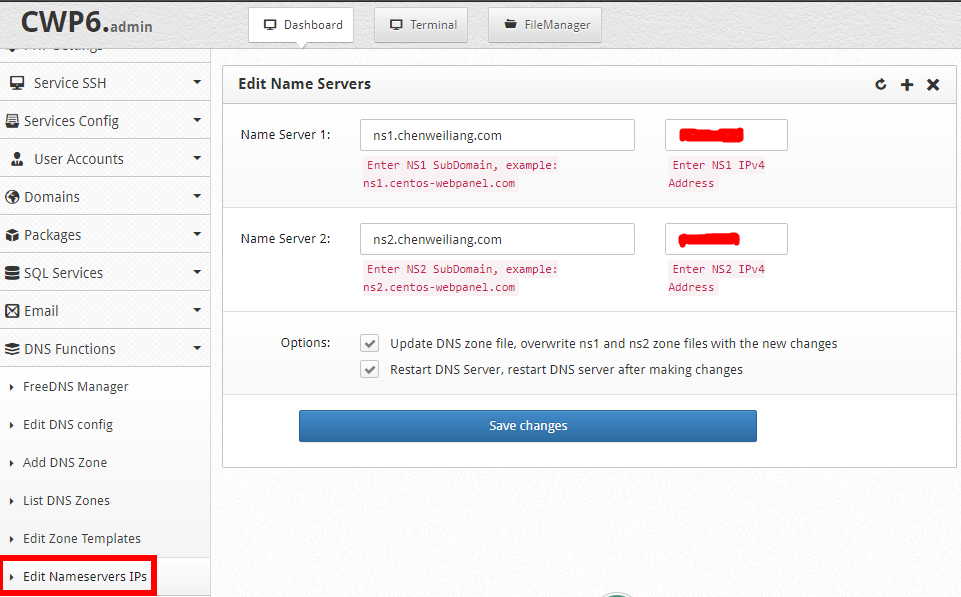
After setting, click Save Changes to save the changes▲
Create a virtual hosting package
- A web hosting package is a web hosting plan that includes access to disk space, bandwidth, FTP accounts, email addresses, databases, and more.
- You can create as many web hosting plans as you want.
To create a virtual hosting plan, go to Packages → Add a Package Enter a name for the virtual host package.
Set the disk quotas allowed to be accessed, the number of processes, FTP, email accounts, databases and subdomains, etc... (personal use can be configured according to the following amounts)▼
Dsk Quota MB:102400Bandwith MB:10485760nproc:999999999apache_nproc:999999999nofiles:999999999inode:999999999- Click the Create button to create a virtual hosting plan▼
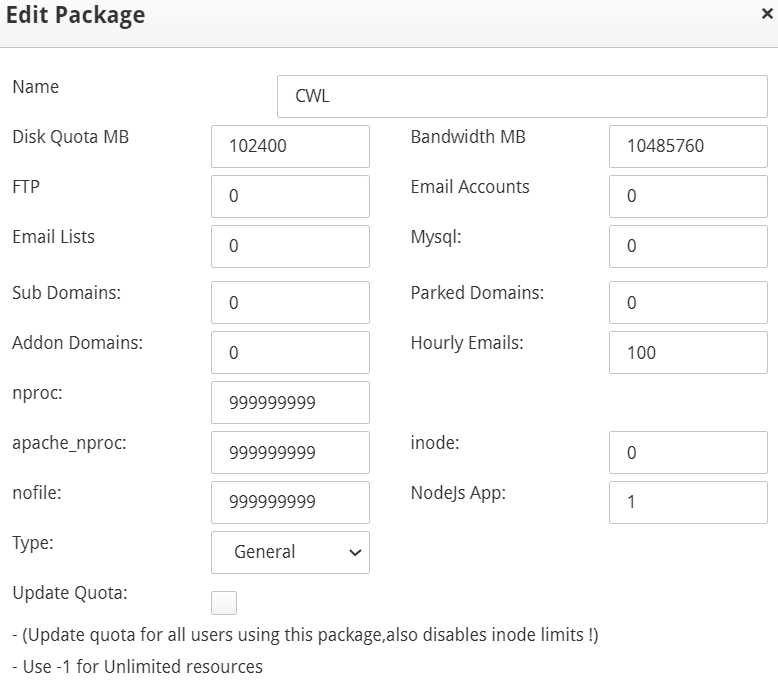
- nproc: Number of processes allowed per user (at least 10, since each instance of nginx/apache/fpm is started as a separate process).
- apache_nproc: See nproc above, but this is Apache-specific.
- nofiles: Number of open files allowed to be read/executed concurrently.
- inode: An inode is a data structure that stores information about all the files created on your hosting account. The inode count represents the number of files, folders, emails, or whatever you have stored on your web hosting account.
Add domain name
- To add a new domain name, you must have at least one user account.
Add user
To add a user, please go to User Account → New Account (For personal use, you can configure the following amounts) ▼
- Enter the domain name (chenweiliang.com), username, password and email address.
Inode:0Process limit:999999999Open files:999999999
Assuming that the VPS configuration is CPU 4 cores + 16GB memory, in order to avoid excessive load and affecting the operation of the website, it is recommended to set it to:
- nproc1000
- nofile 5000
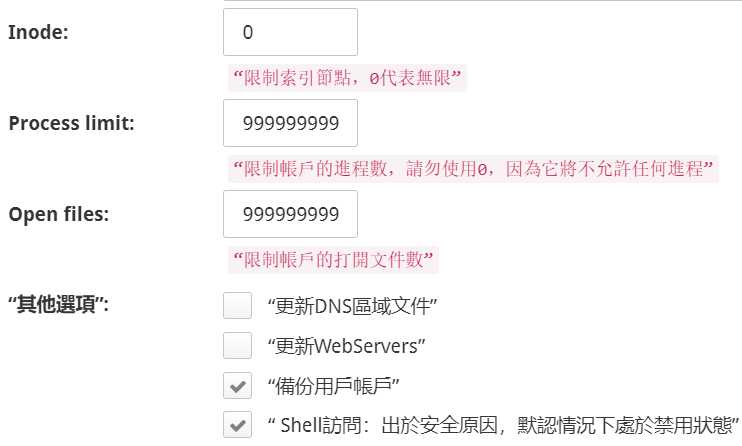
- Finally, click
Create.
Add a domain name
To add a domain name, please enter Domains → Add Domain ▼
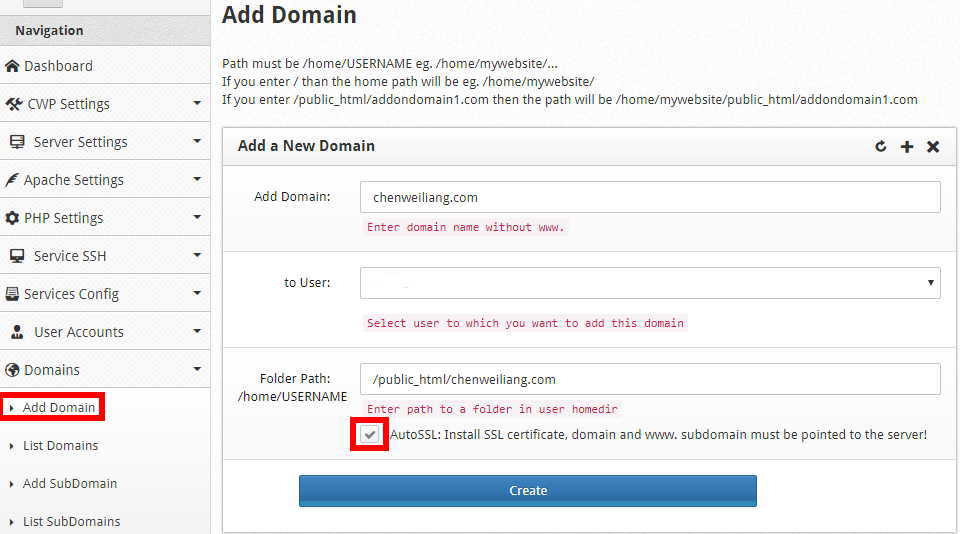
Enter the new domain name and specify the domain name associated with the username▲
- Before checking "AutoSSL",The condition is to set an A record for the domain name.
- First resolve the domain name to the server IP before the SSL certificate can be generated, otherwise an error will occur.
- AutoSSL automatically installs SSL security certificates,Very quick and easy!
- Click Create to use the CWP control panel to manage your domain name.
The CWP control panel displays the default page, please see this tutorial for the solution ▼

http redirect to https configuration, please check this tutorial ▼

- If the SSL certificate is generated incorrectly, please refer to this article to manually generate the SSL certificate.
If the CWP control panel is down and cannot be accessed, and you need commands to start/stop/restart/view the status of the CWP service, please check out this tutorial▼
After just installing the CWP control panel and restarting Apache, you may encounter some problems... The following is the solution▼
Conclusion
In this tutorial, we saw how to install and configure CentOS web pages to create a simple web hosting environment that is easy to install and use.
- even ifInternet marketingA novice can also set up a basic web hosting server in a few hours.
- Also, CWP is completely free and open source, try it out, you won't be disappointed.
More information about the CWP Control Panel you can find in the CentOS Web Panel Wikipage and Docs documentation.
Chen Weiliang compared and used the CWP control panel and the VestaCP panel, and felt that the CWP control panel was more powerful and professional than the VestaCP panel.
If you want to install the VestaCP panel, please check this VestaCP panel installation tutorial▼

What to do after installing CWP
Step 1: On the left side of the CWP Control Panel, click WebServer Settings → Select WebServers ▼
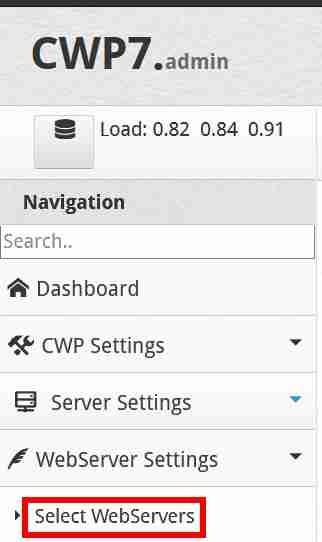
Step 2: Select Nginx, Varnish, and Apache ▼

Step 3: Click the "Save & Rebuild Configuration" button at the bottom to save and rebuild the configuration.
Since the free version of CWP defaults to PHP 5.6, it can easily cause incompatibility issues with WordPress plugins or themes, leading to errors.
Therefore, after installing CWP and selecting Nginx & Varnish & Apache services, we need to manually select the PHP 7.4.28 version.
How does the CWP control panel choose the PHP version?
Here are the steps on how to upgrade your website's PHP version using the CWP control panel :
Click on the left side of the CWP control panel → PHP Settings → PHP Version Switcher: Manually select the PHP 7.4.28 version ▼
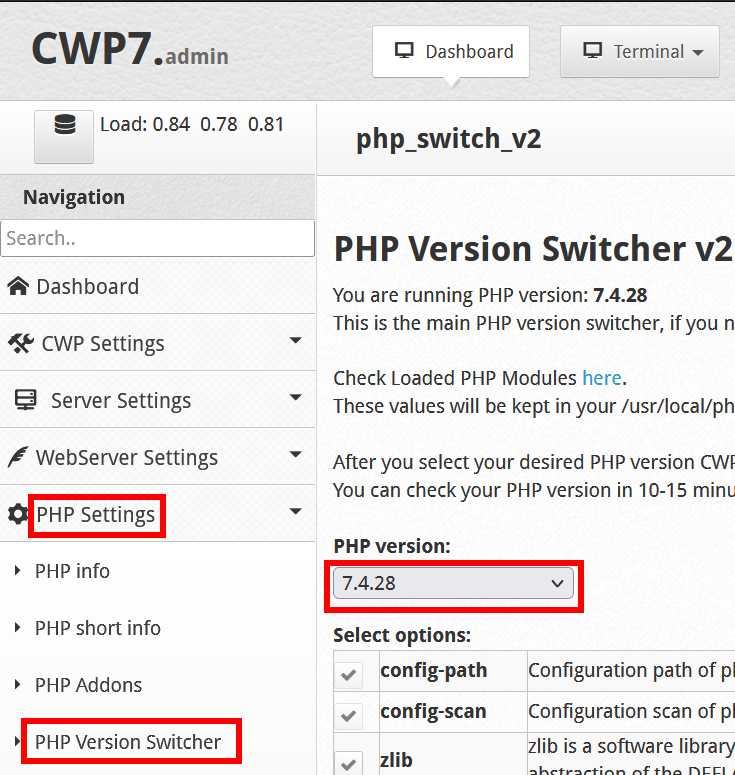
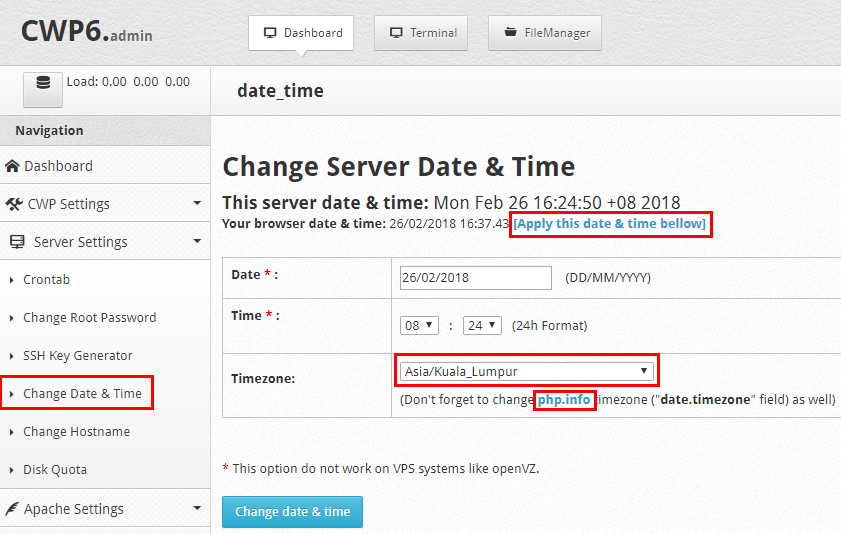
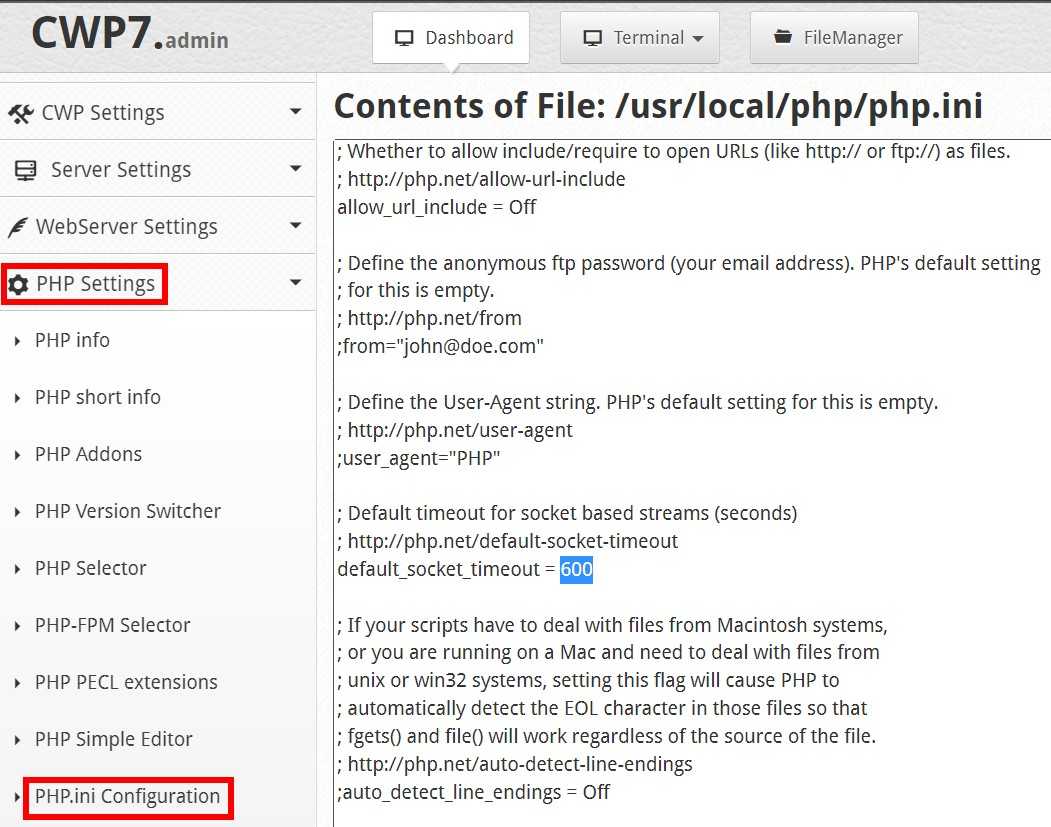
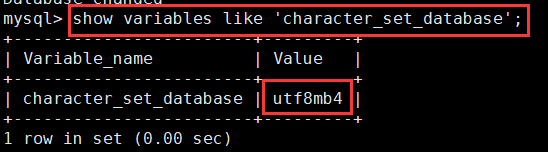
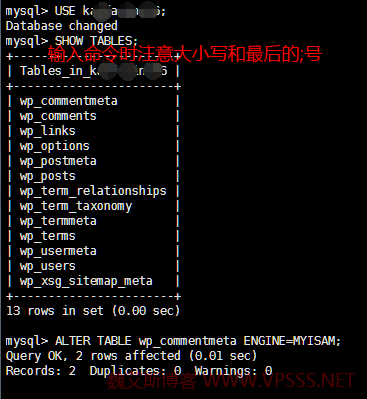
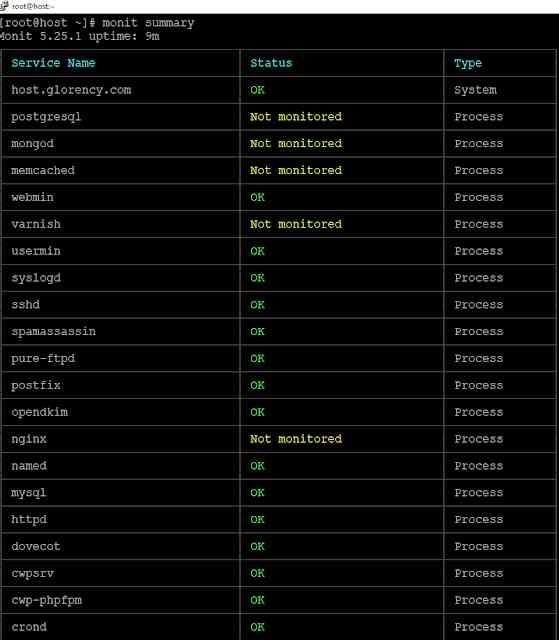
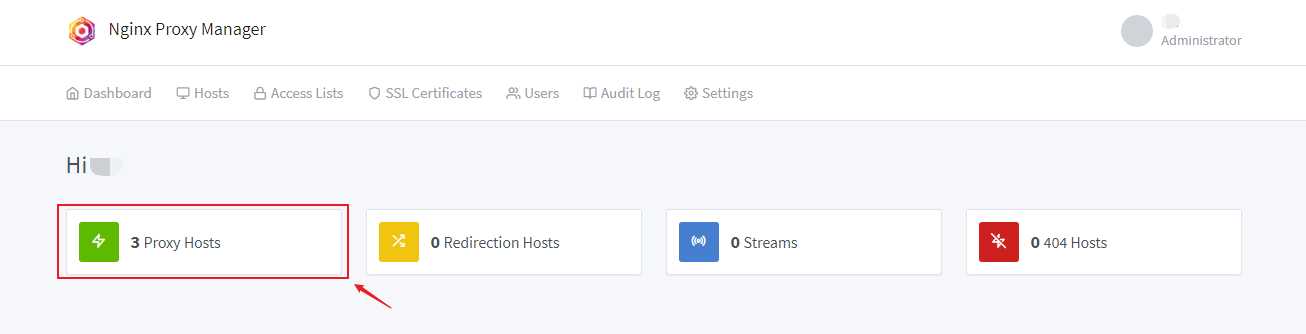
After we install the CWP control panel, we may need to make these settings ▼





Hopefully, the article "How to Install CWP Control Panel? CENTOS WEB PANEL Configuration Tutorial" shared on Chen Weiliang's blog ( https://www.chenweiliang.com/ ) will be helpful to you.
Feel free to share this article's link: https://www.chenweiliang.com/cwl-652.html