
Article directory
- What does WordPress mean?What are you doing?What can a website do?
- How much does it cost to build a personal/company website?Cost of building a business website
- How to choose the right domain name?Website Construction Domain Name Registration Recommendations & Principles
- NameSiloDomain Name Registration Tutorial (Send you $1 NameSiloPromo Code)
- What software is needed to build a website?What are the requirements for making your own website?
- NameSiloResolve Domain Name NS to Bluehost/SiteGround Tutorial
- How to manually build WordPress? WordPress Installation Tutorial
- How to log in to the WordPress backend? WP background login address
- How to use WordPress? WordPress background general settings & Chinese Title
- How to change language settings in WordPress?Change Chinese/English setting method
- How to Create a WordPress Category Directory? WP Category Management
- How does WordPress publish articles?Editing options for self-published articles
- How to create a new page in WordPress?Add/edit page setup
- How does WordPress add menus?Customize navigation bar display options
- What is a WordPress theme?How to install WordPress templates?
- FTP how to decompress zip files online? PHP online decompression program download
- FTP tool connection timeout failed How to configure WordPress to connect to the server?
- How to install a WordPress plugin? 3 Ways to Install a WordPress Plugin - wikiHow
- How about BlueHost hosting?Latest BlueHost USA Promo Codes/Coupons
- How to install Bluehost automatically with one clickWordpress? BHBuilding website教程
- Detailed explanation of the custom template path code of the WordPress Shortcodes Ultimate plugin
Bluehost Auto Install WordPress Tutorial

Step 1: Log in to the Bluehost backend
Click here to visit BlueHost official websiteIf your English isn't good, we recommend using Google Chrome's automatic translation feature. ▼
After logging in, you can see, as shown in the screenshot below ▼
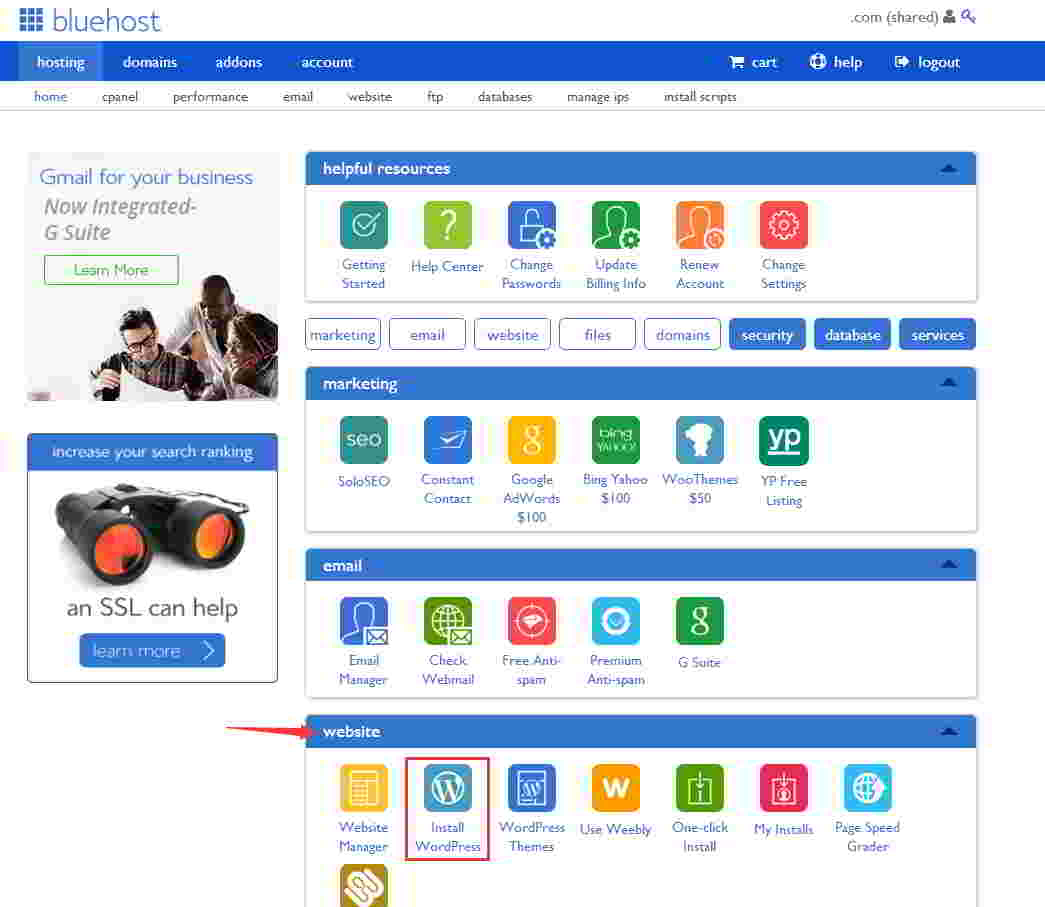
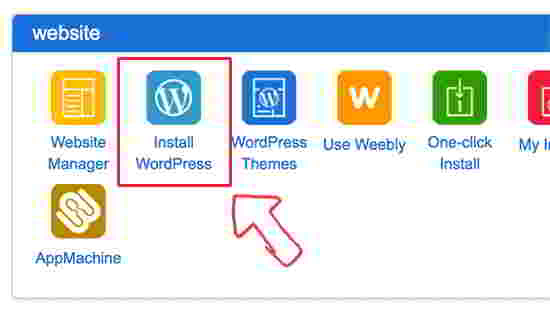
Step 2: Locate the "Website" tab
Then click "Install WordPress" ▼
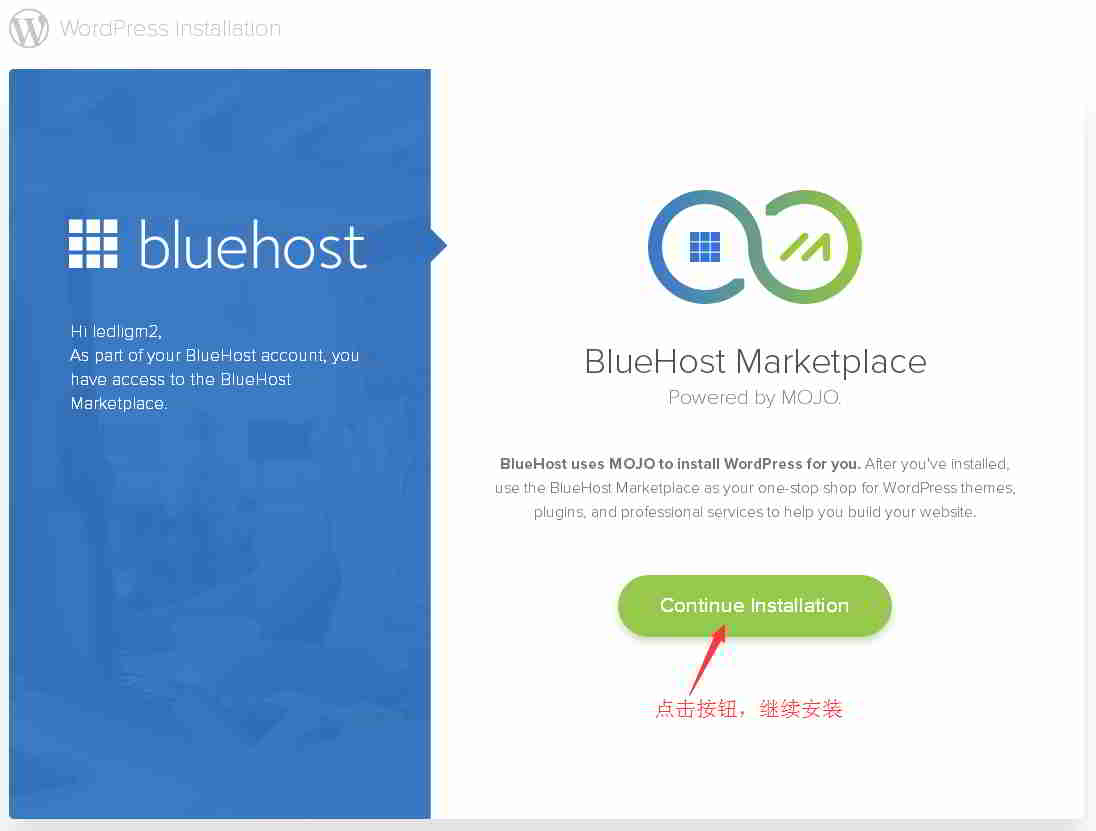
After clicking "Install WordPress", BlueHost will send a "Welcome to the MOJO Marketplace" email.
Never mind it anyway, because MOJO Marketplace is a marketplace of services selling WP themes, plugins, and more.
Relationship between MOJO Market place and BlueHost
- MOJO Marketplace and BlueHost belong to the parent company EIG Group, so BH is also going to great lengths to promote MOJO Marketplace.
- MOJO Marketplace's goal is not small, it wants to become a platform provider like EnvatoMarket (the company that ThemeForest and CodeCanyon belong to), but it is still too far away.
- At least buy WP themes, the first reaction of foreign WP users is ThemeForest.
Bluehost forcibly sells its own MOJO market ▼
- Don't worry, just click a button to install.
- If you do not understand English, you can ignore it.
Step 3: Uncheck the plugin ▼
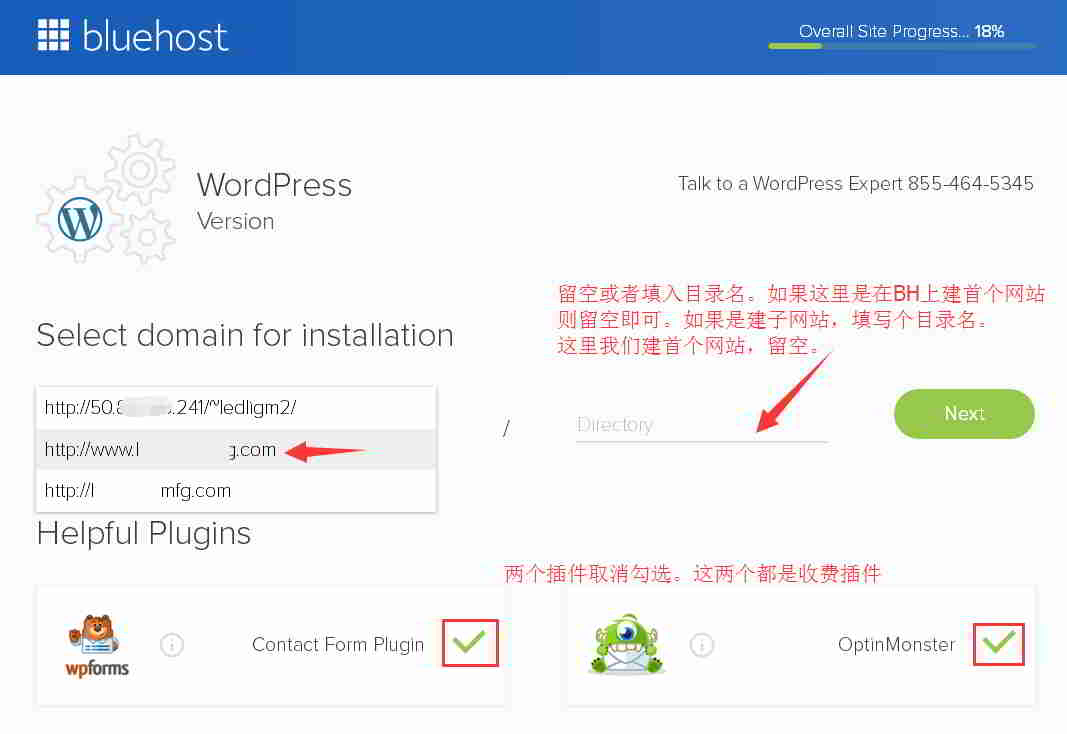
- Uncheck, these 2 are paid plugins.
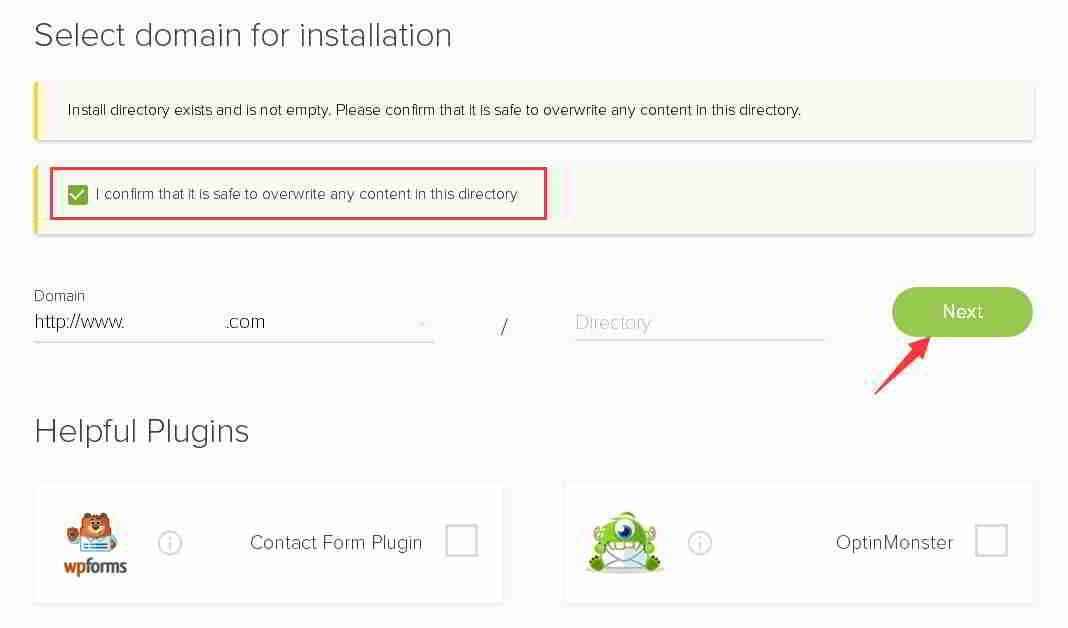
Step 4: After clicking "NEXT", the system will prompt you that the installation directory already exists and is not empty. ▼
- Make sure you want to install the overlay to this directory.
- Check the box to confirm and click NEXT.
Step 5: Enter your website name, username, and password ▼
- Enter the website name (Name/Title)
- Background administrator mailbox (Admin Email Address)
- Username (Admin Username) and administrator login password
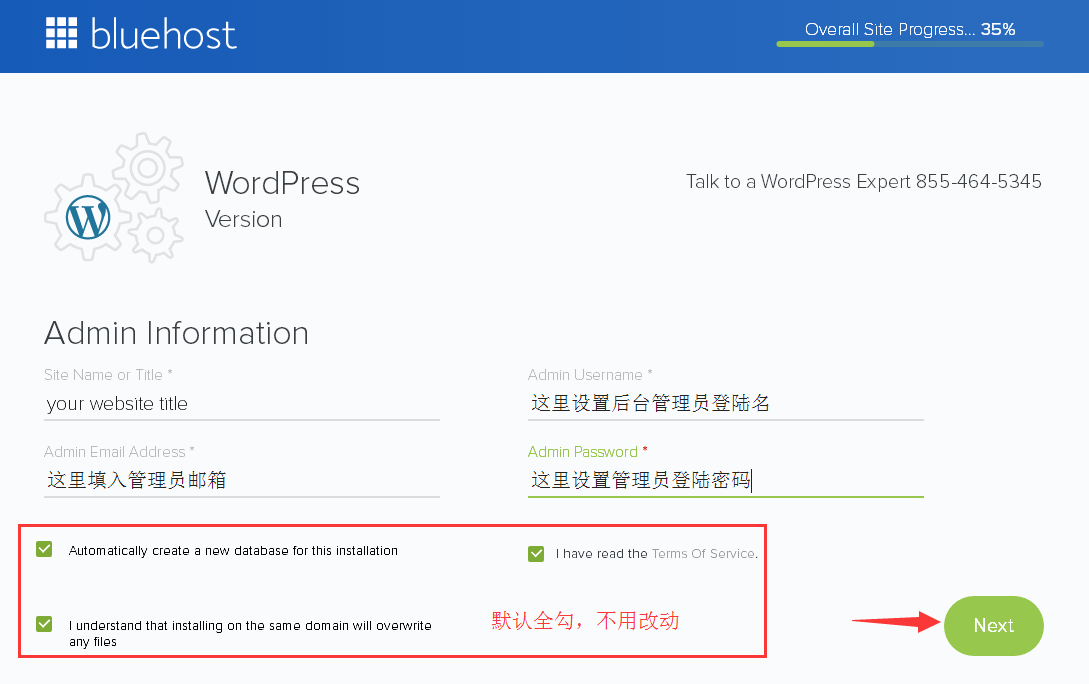
- Please write the title of the website name (the title can be whatever you want).
- BecauseWordPress backend, you can change it at any time.
- By default, there are 3 default checked options below, ignore it.
- Once completed, click NEXT.
Step 6: Patiently wait for Bluehost to automatically install WordPress ▼
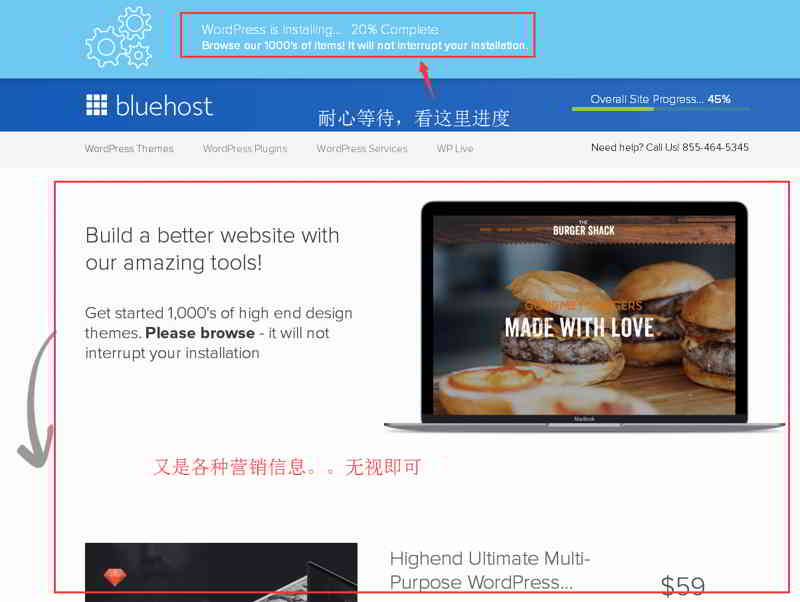
▲ During the installation process, Bluehost will also show you some website templates, asking if you need it?
- Forget about the templates, you just have to wait for the installation to complete
- If all goes well, you will be prompted "Installation Complete" at the top.
When you see this message, your WordPress is already installed ▼

Step 7: Click the "view your credentials" link above ▲
Then, go to the following page ▼
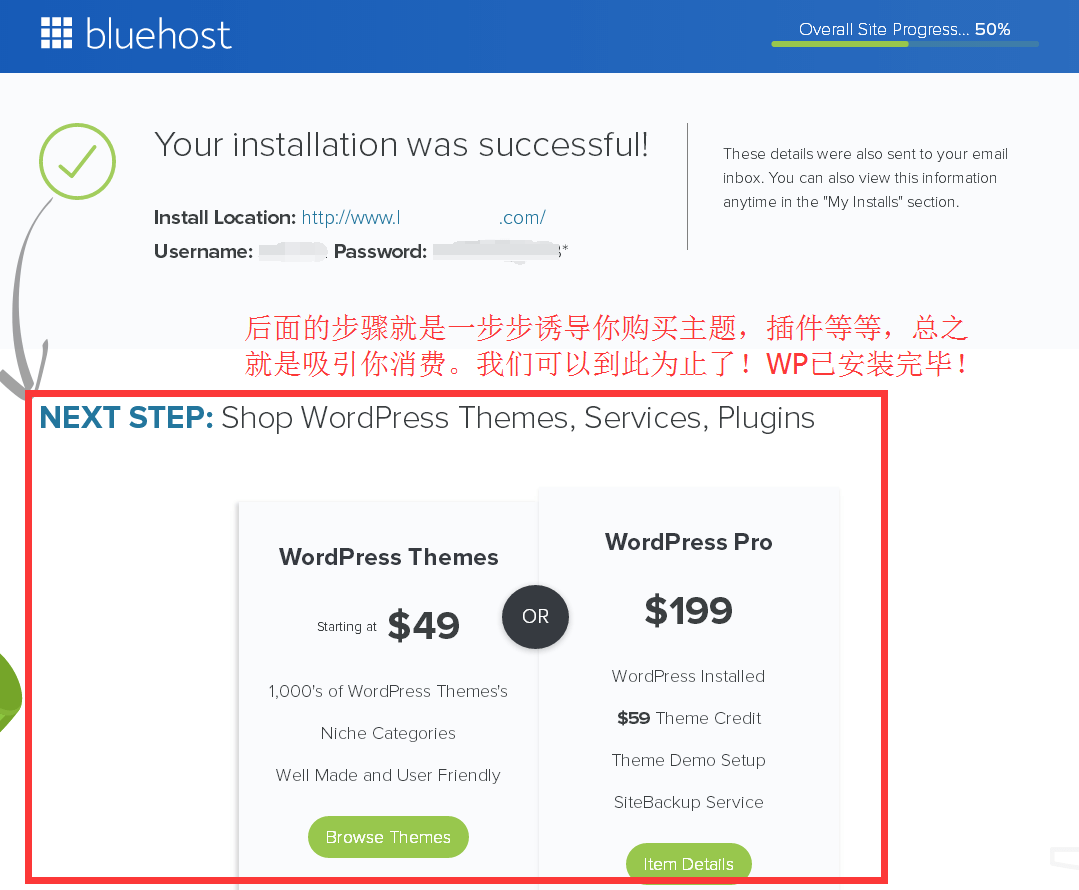
Step 8: By default, you can log in to the WordPress admin panel using the following two URLs ▼
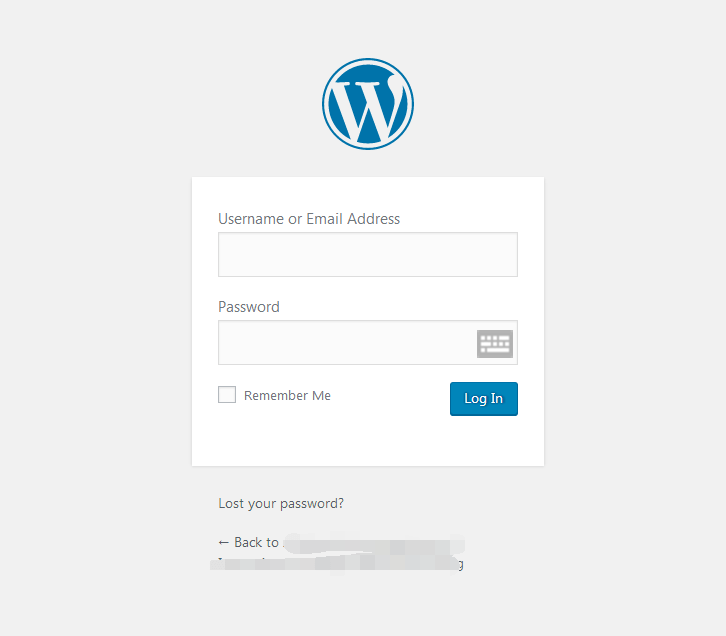
- www.yourdomain.com/wp-admin
- www.yourdomain.com/wp-login.php
Visit the WordPress background URL, the following WordPress login page will be displayed ▼
Why might the website be inaccessible?
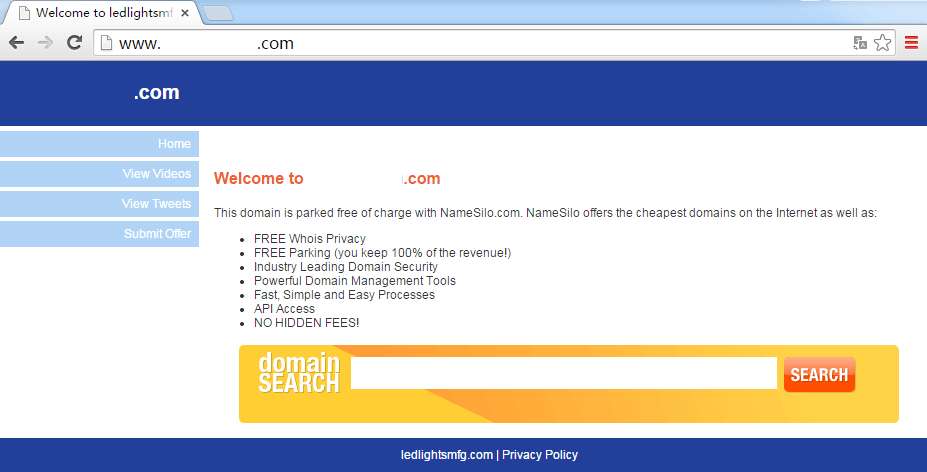
If you visit your domain name, you may find that your website home page and background login page are not displayed.
Shows that the domain name is parked (parked) atNameSiloon ▼
- This means that your domain name has not passed the domain name resolution.
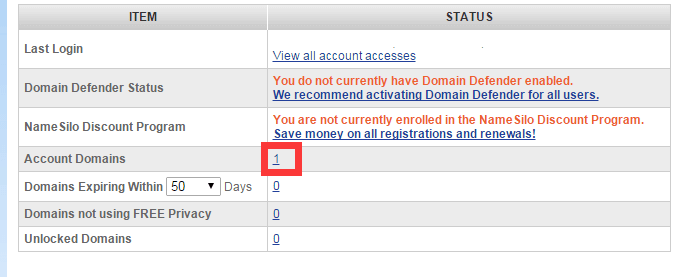
OnNamesiloOn the domain name list page, you can see that the status of the domain name is "parked" ▼
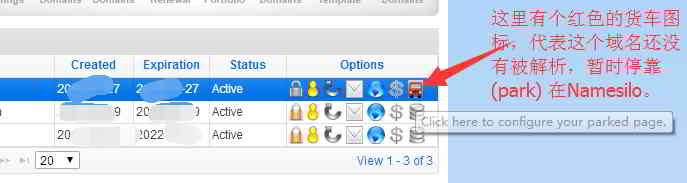
If you plan to transfer NS domain name resolution to Bluehost, you need toNameSiloNS modification in .
modifyNameSiloNS domain name resolution method, please check this tutorial ▼
About Free SSL Certificates
Check your email, you should receive 2 emails:
- The title is BLUEHOST ORDER COMPLETE, the content is "order bill (order bill)", and it tells you that "free SSL certificate (free SSL certificate)" fee is 3 for 0 months.
- The title of the other email was: "SSL Certificate will not install automatically for": your domain.com.
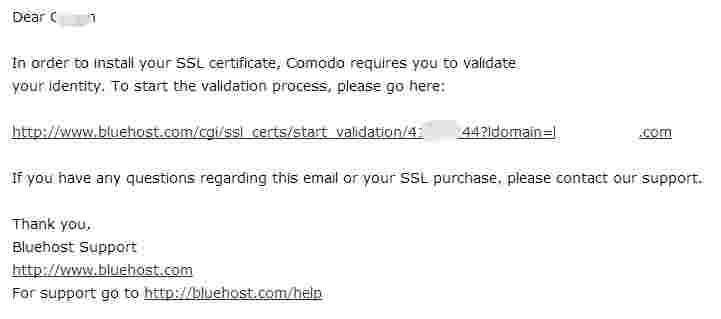
Open the e-mail, the content of the e-mail is to tell you:
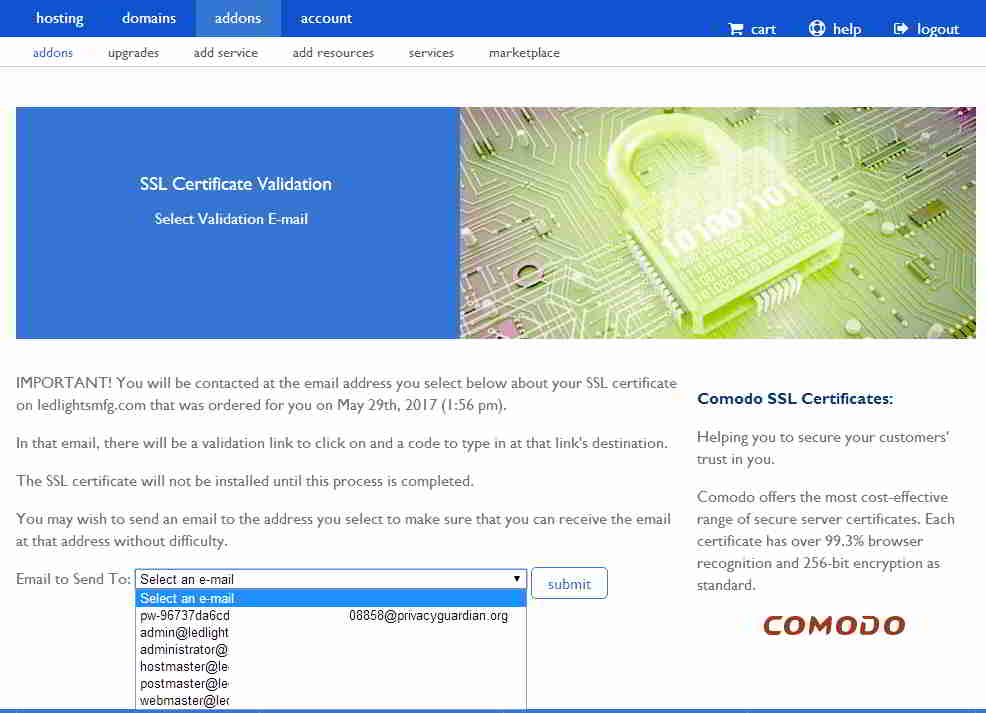
- In order to install the SSL certificate, you need to click the verification link link, after clicking the verification you need to send the verification email again ▼
After clicking, you will enter this BlueHost page ▼
Regarding the SSL certificate, although the free period is only 3 months, it can be renewed for free, so basically we can use it for free anytime.
For SSL certificates, if you are not in a hurry to install https, you can get them later.
This concludes the Bluehost automatic WordPress installation and website building tutorial . ^_^
Extended reading:



Hopefully, the article "How to Automatically Install WordPress with One Click on Bluehost? BH Website Building Tutorial" shared on Chen Weiliang's blog ( https://www.chenweiliang.com/ ) will be helpful to you.
Feel free to share this article's link: https://www.chenweiliang.com/cwl-858.html